Installing a Sonos home theater system isn’t like traditional receiver-based setups. There’s no tangle of RCA cables, no AVR manual the size of a phone book, and no need to decode cryptic HDMI handshake errors. Sonos uses Wi-Fi and simplified wiring to deliver room-filling sound with a setup process that most homeowners can complete in an afternoon. But that simplicity doesn’t mean you should skip planning. Room acoustics, component compatibility, TV connections, and network requirements all matter. This guide walks through everything needed to get a Sonos home theater running properly, from selecting the right components for the space to dialing in sound settings that actually take advantage of what the system can do.
Table of Contents
ToggleKey Takeaways
- A Sonos home theater setup uses Wi-Fi connectivity instead of traditional receiver-based wiring, allowing most homeowners to complete installation in an afternoon without complex cable management.
- Choose your Sonos components based on room size: the Arc for larger spaces with Atmos support, the Beam for medium rooms, and the Ray for compact areas or bedrooms.
- Proper soundbar placement directly below or above the TV with clear airflow, combined with strategic subwoofer positioning using the subwoofer crawl method, significantly impacts overall sound quality.
- Run Trueplay tuning on iOS devices to optimize room acoustics and EQ settings, or manually adjust audio levels through the app if Trueplay isn’t available.
- A stable home Wi-Fi network is essential for a Sonos home theater setup; consider adding a mesh network node or Sonos Boost if the signal is weak in your TV room.
- Verify your TV supports HDMI ARC or eARC before purchasing, as this connection type determines what audio formats your system can deliver and whether Dolby Atmos is possible.
What You Need to Know Before Setting Up Your Sonos Home Theater
Sonos systems rely on a stable home network. The speakers connect via Wi-Fi, not Bluetooth, so a router with adequate coverage in the TV room is non-negotiable. If the Wi-Fi signal is weak where the soundbar will sit, consider adding a mesh network node or using Sonos Boost, a dedicated wireless bridge that creates a separate SonosNet network.
Check the TV’s available ports before buying anything. Most Sonos soundbars connect via HDMI ARC (Audio Return Channel) or the newer HDMI eARC (enhanced ARC). eARC supports higher-quality formats like Dolby Atmos, which some Sonos models can decode. Older TVs may only have optical audio outputs, which work but limit audio format options. Adapters exist, but it’s better to know the limitation upfront.
Sonos components don’t require a traditional AV receiver. The soundbar acts as the hub, and additional speakers (rears, subwoofer) connect wirelessly to it. This means no speaker wire runs through walls, a big plus for renters or anyone avoiding drywall surgery. But, each powered component needs an outlet. Plan power access for the soundbar, subwoofer, and any surround speakers.
Permits and codes aren’t typically required for a plug-and-play speaker system, but if mounting a soundbar or in-wall speakers, follow manufacturer weight limits and use appropriate anchors for the wall type. Drywall alone won’t support a 20-pound soundbar, toggle bolts or studs are necessary.
Choosing the Right Sonos Components for Your Space
Start with the soundbar. The Sonos Arc is the flagship model with Dolby Atmos support, 11 drivers, and upward-firing speakers for height channels. It fits rooms 12 feet wide or larger and works best with eARC-capable TVs. For smaller spaces or tighter budgets, the Sonos Beam (Gen 2) delivers solid performance in rooms up to about 10–12 feet wide and still supports Atmos via eARC. The Sonos Ray is the entry-level option, no Atmos, compact size, good for bedrooms or secondary spaces. Soundbar options vary based on room size and audio format priorities.
Adding a Sonos Sub (or the smaller Sub Mini) makes a noticeable difference, especially in larger rooms where the soundbar alone can sound thin on low frequencies. The standard Sub handles rooms over 150 square feet: the Sub Mini works well in apartments or spaces under 150 square feet. Both connect wirelessly, no cables to hide.
For true surround sound, add a pair of Sonos Era 100 or Era 300 speakers as rears. The Era 300 includes upward-firing drivers for spatial audio, which pairs well with an Arc. The Era 100 is more affordable and still delivers clear dialogue and effects. Alternatively, the older Sonos One SL works as a budget rear option. Placement matters more than model, rears should sit slightly behind and to the sides of the seating area, roughly ear level when seated.
Room size and layout determine component count. A 200-square-foot living room benefits from a full setup (Arc, Sub, two Era 300s). A 120-square-foot den works fine with a Beam and Sub Mini. Don’t overbuild, Sonos gear is modular, so starting with a soundbar and adding components later is smarter than buying everything upfront and discovering the Sub overpowers a small room.
Step-by-Step Installation Guide for Your Sonos Home Theater
Materials and tools:
- Sonos soundbar, subwoofer, and/or surround speakers
- HDMI cable (high-speed, rated for eARC if using Atmos)
- Power outlets for each component
- Sonos app (iOS or Android)
- Smartphone or tablet connected to home Wi-Fi
- Measuring tape
- Level (for wall mounting)
- Stud finder and appropriate mounting hardware (if wall mounting)
Safety note: When drilling into walls, always check for electrical wiring and plumbing behind the surface. Use a stud finder with wire-detection capability.
Installation steps:
-
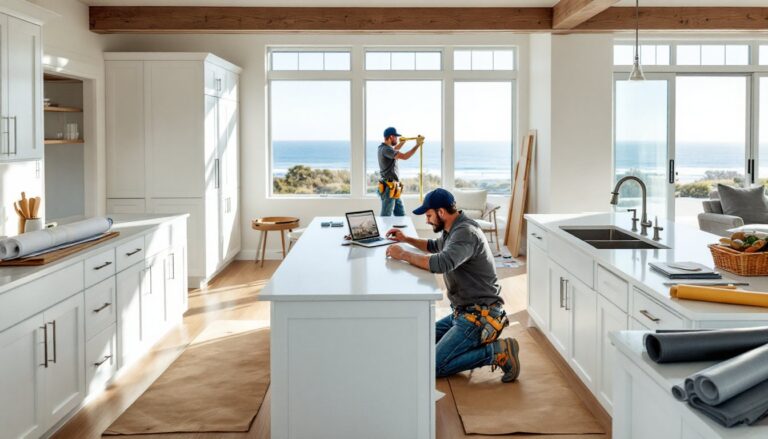
Position the soundbar. Place it directly below or above the TV, centered. If wall-mounting, locate studs and use the manufacturer’s bracket. The soundbar should align with the TV’s center and sit close to ear level when seated. Leave at least 2 inches of clearance on sides and back for airflow.
-
Connect the soundbar to the TV. Plug one end of the HDMI cable into the soundbar’s HDMI port and the other into the TV’s HDMI ARC or eARC port (usually labeled). If the TV lacks HDMI ARC, use the included optical adapter. Turn on the TV and soundbar.
-
Power on and enable TV settings. In the TV’s audio settings, enable HDMI CEC (may be called Anynet+, Bravia Sync, Simplink, etc.) and set audio output to the HDMI ARC port or external speakers. For eARC and Atmos, ensure the TV’s audio format is set to Auto or Passthrough, not PCM.
-
Place the subwoofer. Set it anywhere in the room, corner placement often enhances bass, but experiment. The Sub connects wirelessly, so proximity to the soundbar isn’t critical. Avoid placing it inside cabinets or directly against walls, which can cause boomy, muddy bass.
-
Position surround speakers. Place rears 6–10 feet from the seating area, angled slightly toward the center. Wall-mount them or use floor stands to get them to ear height (about 3–4 feet off the floor). Plug them in, they’ll pair wirelessly during setup.
Connecting and Configuring Your Sonos System
Download the Sonos app and create an account (or log in). Tap Set up a new system, then follow prompts to add the soundbar. The app will detect the soundbar on the network and walk through TV connection confirmation.
Once the soundbar is added, go to Settings > System > [Room Name] > Add Surrounds to pair rear speakers. The app will play test tones to confirm left and right channels. For the subwoofer, tap Settings > System > [Room Name] > Add Sub. The app will locate and pair it automatically.
Run Trueplay tuning if using an iOS device (Android doesn’t support Trueplay). This uses the phone’s microphone to analyze the room and adjust EQ. Walk slowly around the seating area while waving the phone as instructed. The difference is audible, Trueplay corrects for room acoustics, reducing echo and tightening bass. Without it, sound can be harsh or boomy. If an iOS device isn’t available, manual EQ adjustments in the app work, but Trueplay is more precise.
Optimizing Sound Quality and Placement
Soundbar placement impacts clarity more than most people expect. If the soundbar sits inside a TV cabinet or recessed shelf, dialogue suffers. Pull it forward to the front edge of the furniture, or wall-mount it. Angling it slightly upward (if on a low stand) can improve mid-range detail.
Sub placement is trial-and-error. Start in a corner, play bass-heavy content, then move the sub around. The “subwoofer crawl” works: place the sub in the main seating spot, play a bass test track, then crawl around the room’s perimeter. Where the bass sounds fullest and tightest is where the sub should go. Swap positions and test from the couch.
Surround speaker height matters. Mounting them too high (above 5 feet) makes effects sound disconnected from the action. Too low, and they’re drowned out by the soundbar. Ear level when seated is the target. If wall-mounting isn’t an option, floor stands work, just aim them toward the seating area.
In the Sonos app, adjust surround audio levels under settings. The default “Ambient” setting keeps rears subtle: switching to “Full” pushes more sound to the surrounds, which works better for movies. Sub level can also be tweaked, start at the default and nudge it up or down based on whether bass feels overpowering or thin. Don’t crank it past +5 or +6: that usually muddies dialogue and effects.
For Dolby Atmos content, enable Height Audio in the app (if using an Arc or Beam Gen 2). Stream Atmos content via apps like Netflix, Disney+, or Apple TV+. Not all content is Atmos, and not all streaming devices pass it through correctly, Apple TV 4K and newer Fire TV sticks handle it well. Roku devices can be finicky. The TV’s audio settings must also allow Atmos passthrough, not downmix to stereo.
Budget-conscious setups can start with a soundbar alone and add components as funds allow. The system remains modular, so there’s no penalty for phasing in upgrades.
Troubleshooting Common Sonos Setup Issues
No sound from the soundbar: Confirm the TV’s audio output is set to external speakers or HDMI ARC in the TV settings menu. Some TVs default back to internal speakers after updates. Check that the HDMI cable is seated fully in both the soundbar and the TV’s ARC port. If using optical, make sure the TV’s digital audio output is set to Dolby Digital, not PCM (which limits surround formats).
Soundbar connects but rears or sub won’t pair: Ensure all components are on the same Wi-Fi network or SonosNet. Reboot the soundbar by unplugging it for 10 seconds, then try adding the surrounds or sub again. If the app can’t find them, factory reset the problematic component (press and hold the pairing button on the back until the LED flashes orange, then set up as new).
Audio sync issues (lip sync lag): This usually stems from TV processing delay. In the Sonos app, go to Settings > System > [Room Name] > Audio Delay and adjust until dialogue matches the picture. If the TV has a “Game Mode” or “Instant” picture setting, enabling it reduces processing lag.
Dropouts or stuttering audio: Wi-Fi interference is the likely cause. Move the router closer, switch to a less congested Wi-Fi channel (use a Wi-Fi analyzer app to find one), or add a Sonos Boost to create a dedicated network. Thick walls, microwaves, and baby monitors all interfere with 2.4 GHz signals, Sonos can use 5 GHz, but not all models support it.
Atmos content plays as stereo: Verify the TV supports eARC and that eARC is enabled in TV settings. The HDMI cable must be rated for eARC (high-speed or ultra-high-speed). Check the streaming device, older Roku or Fire TV sticks don’t pass Atmos. In the Sonos app, play Atmos content and check Settings > System > About My System, it should list “Dolby Atmos” under Audio In.
Trueplay tuning fails: Ensure the iOS device’s microphone isn’t obstructed by a case. Close other apps and disable Do Not Disturb. Walk slowly and cover the entire seating area, rushing causes errors. If it still fails, skip Trueplay and manually adjust bass, treble, and loudness in the app’s EQ settings. Speaker recommendations often include performance notes for rooms where Trueplay isn’t available.
Conclusion
A properly configured Sonos home theater delivers clean, room-filling sound without the complexity of traditional AV receivers. Most setups finish in a few hours, less if the room already has good Wi-Fi and the TV supports eARC. The modular design means starting small and expanding later makes sense, especially if budget or room size is uncertain. Take the time to run Trueplay, experiment with component placement, and verify TV audio settings. Those steps separate systems that sound fine from ones that sound dialed in.