Heating a tiny home efficiently without draining power or eating into precious square footage demands more than a space heater. Wood stoves deliver reliable warmth, reduce reliance on propane or electric systems, and add a functional focal point that doubles as a cooking surface. But stuffing a full-size stove into 200 square feet is a recipe for scorched walls and building code violations. The right tiny home wood stove balances compact dimensions with enough BTU output to keep occupants comfortable through winter, all while meeting strict clearance and ventilation requirements. This guide walks through choosing, installing, and maintaining a wood stove designed for tight quarters.
Table of Contents
ToggleKey Takeaways
- A tiny home wood stove rated for 8,000–15,000 BTU with compact dimensions under 16 inches wide delivers efficient off-grid heating without consuming floor space in tight quarters.
- Strict clearance requirements (36 inches unprotected, 12–18 inches with approved heat shields) and UL-listed components are non-negotiable for legal and safe installations that meet NFPA and IRC codes.
- Proper installation requires certified professionals, structural anchoring to trailer framing, and an outside air intake kit to prevent negative pressure and backdrafting in sealed tiny homes.
- Chimney maintenance at least twice per heating season prevents dangerous creosote buildup that can ignite at 450°F and cause fires in the compact systems found in tiny homes.
- Burning seasoned hardwood dried to below 20% moisture content maximizes heat output and minimizes smoke and creosote, reducing both maintenance demands and long-term system wear.
Why Wood Stoves Are Ideal for Tiny Homes
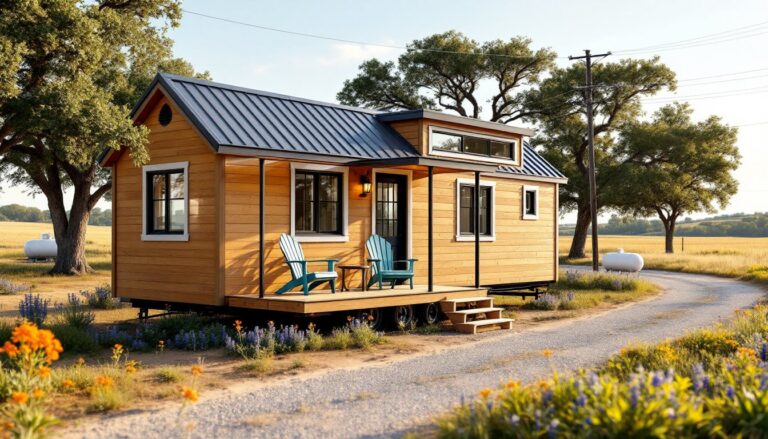
Wood stoves solve three core problems in tiny living: they produce serious heat without electricity, they don’t depend on fuel tanks that consume floor space, and they create usable cooking surface during power outages. Unlike ductless mini-splits or propane wall heaters, wood stoves work off-grid, a necessity for homeowners who tow their tiny homes to remote parcels or who want energy independence.
Radiant heat from a properly sized wood stove warms walls, furniture, and occupants directly, making small spaces feel comfortable at lower air temperatures. That efficiency matters when every watt counts and insulation is tight. A well-designed tiny home traps heat effectively, meaning a 10,000–15,000 BTU stove can keep 100–300 square feet toasty even in cold climates.
Wood is often cheaper and more accessible than propane, especially in rural areas. Homeowners who source firewood locally or process their own reduce fuel costs to near zero. The same stove that heats the space can also boil water, cook meals, or dry wet gear, multi-use functionality that pays off in homes where every item needs to earn its footprint.
Many tiny home communities and builders now incorporate wood stoves into their standard designs, recognizing that the trade-offs, daily fire tending, ash removal, and chimney cleaning, are acceptable for those who prioritize resilience and low operating costs. Publications focused on small space living ideas frequently highlight wood stoves as both practical heating solutions and design statements.
Key Features to Look for in a Tiny Home Wood Stove
Not every compact stove fits a tiny home. The right model meets strict clearance requirements, delivers consistent heat without overheating the space, and integrates safely with lightweight wall framing and roof structures. Here’s what to prioritize.
Size and Heat Output Requirements
Physical dimensions matter as much as BTU output. Look for stoves with a footprint under 16 inches wide and 20 inches deep, anything larger eats into walkways or storage. Height varies, but shorter models (under 24 inches) improve sight lines and reduce ceiling clearance issues.
Heat output should match the home’s volume and insulation quality. For well-insulated tiny homes (R-13 walls, R-30 roof), calculate roughly 30–40 BTU per square foot. A 200-square-foot home needs 6,000–8,000 BTU: a 300-square-foot home may handle 10,000–12,000 BTU comfortably. Oversized stoves force occupants to run small fires inefficiently, leading to creosote buildup and poor combustion.
Stoves rated for 8,000–15,000 BTU hit the sweet spot for most tiny homes. Models like the Cubic Mini, Dwarf 3kW, or Hobbit are purpose-built for this range. Marine-grade and RV-certified stoves often include features useful in tiny homes: welded seams, robust door latches, and compact chimneys designed for mobile applications.
Firebox size determines burn time. A firebox that holds 10–12-inch logs allows 3–4 hour burns without constant reloading. Smaller fireboxes (6–8 inches) require more frequent feeding but generate less peak heat, which can prevent overheating in ultra-compact spaces.
Safety Features and Clearance Specifications
Clearances to combustibles are non-negotiable. The National Fire Protection Association (NFPA) and International Residential Code (IRC) require unprotected combustible walls to remain at least 36 inches from stove sides and rear. With an approved heat shield, typically 24-gauge sheet metal over a 1-inch air gap, that distance can drop to 12–18 inches, depending on the stove’s listing.
Tiny homes rarely have 36 inches to spare. UL-listed heat shields and manufacturer-approved wall protection systems make tight installations legal and safe. Double-wall stovepipe with proper thimbles and ceiling supports further reduces clearance needs. Homeowners should verify their stove’s installation manual against local code: some jurisdictions require third-party inspections even for non-permanent structures.
Floor protection is mandatory. Non-combustible hearth pads extend at least 8 inches beyond the stove’s front (where embers fall during loading) and 6 inches to the sides and rear. Materials include cement board, tile over steel, or prefab pads rated for wood stoves. Avoid tempered glass or thin stone, cracking from heat cycling creates hazards.
Glass doors with air-wash systems keep viewing windows clear and allow occupants to monitor combustion without opening the stove. Look for ceramic glass rated to 1,200°F. Some stoves include bypass dampers or adjustable air intakes, giving fine control over burn rate and heat output, critical when indoor temperatures swing quickly.
Chimney and venting deserve close attention. Tiny homes need Class A, double- or triple-wall chimney pipe that can handle flue temperatures above 1,000°F. Single-wall pipe is acceptable inside, but only for the first 18–24 inches: after that, transition to insulated pipe. Chimneys must extend at least 2 feet above any roof surface within 10 feet and 3 feet above the roof penetration, per IRC guidelines. Some builders opt for through-the-wall venting to simplify roof sealing, but vertical chimneys draft better and reduce creosote.
Models with built-in spark arrestors and UL or EPA certification provide peace of mind and may satisfy insurance requirements. Tiny homeowners moving between states or municipalities benefit from nationally recognized certifications that smooth permitting.
Installing Your Wood Stove: What You Need to Know
Installing a wood stove in a tiny home is not a weekend DIY project for beginners. It involves cutting through insulated walls or roofs, mounting heat shields to framing, and assembling a chimney system that won’t leak or collapse during transport. Hiring a certified installer or WETT (Wood Energy Technology Transfer) inspector is worth the cost, especially for homeowners who plan to insure or sell the home later.
Permitting varies by location. Even though many tiny homes qualify as RVs or mobile structures, some jurisdictions treat them as dwellings and require building permits for solid-fuel appliances. Check with local code enforcement before starting. If the home is registered as an RV, RV-specific stoves (often marine-rated) may simplify approval.
Structural considerations matter. Tiny homes built on trailers experience vibration and movement. Secure the stove to the floor using lag bolts or through-bolts into trailer-mounted framing. The chimney must be stabilized with roof brackets and guy wires if the home will be towed: unsupported chimneys can bend or separate at joints.
Cut the roof or wall penetration carefully. Use a hole saw or jigsaw to match the chimney diameter plus clearance (typically 2 inches all around for Class A pipe). Install a roof flashing kit designed for the pipe diameter, seal with high-temperature silicone, and add a storm collar to shed water. On metal roofs, use self-tapping screws and butyl tape under the flashing.
Run chimney sections from the stove upward, male end up, so creosote drips back into the stove rather than leaking at joints. Secure each joint with three sheet metal screws. Support the chimney at the ceiling with an insulated support box rated for the pipe type. Many tiny home builders prefer modular chimney kits from manufacturers like DuraVent or Selkirk, which include pre-cut lengths, supports, and flashing in one package.
Fresh air intake is often overlooked. Tiny homes are tightly sealed, and wood stoves consume significant oxygen. An outside air kit pipes combustion air directly to the stove, preventing negative pressure that can backdraft flue gases or draw in cold drafts. Some stoves have built-in air intake ports: others require a separate duct routed through the floor or wall.
Test the installation before finishing interior surfaces. Light a small fire, check for smoke leaks at joints, and verify the stove draws properly. Use a magnetic stovepipe thermometer to confirm flue temperatures stay between 300–500°F during normal burns, too cool risks creosote, too hot can damage the chimney. Homes focused on sustainable home design often integrate wood stoves early in the planning process to streamline structural and ventilation details.
Maintaining Your Tiny Home Wood Stove for Longevity
A wood stove that heats reliably season after season demands regular upkeep. Small fireboxes and compact chimneys accumulate creosote faster than full-size systems, making maintenance schedules tighter.
Clean the chimney at least twice per heating season, more often if burning softwood, unseasoned wood, or running low, smoldering fires. Creosote buildup ignites at around 450°F, causing chimney fires that can crack flue liners or ignite nearby framing. Use a wire chimney brush sized to the flue diameter, working from the roof down or bottom up depending on access. Homeowners uncomfortable on roofs should hire a chimney sweep: costs typically run $150–$250 per cleaning.
Remove ash weekly during active use. Let the stove cool completely, scoop ash into a metal container with a lid, and store it outside on a non-combustible surface for at least three days, coals can smolder for days. Ash makes excellent garden amendment (raises soil pH) or ice traction material.
Inspect door gaskets and glass monthly. Rope gaskets that compress or fray leak air, reducing combustion efficiency and control. Replace gaskets when a dollar bill slips out easily when closed in the door. Clean glass with damp newspaper and ash (a mild abrasive) or a commercial wood stove glass cleaner, avoid ammonia-based products that can etch ceramic glass.
Check chimney joints and flashing before and after towing the home. Vibration loosens screws and can crack sealant. Tighten fasteners and reapply high-temp silicone as needed. Inspect the chimney cap for rust or blockages (birds, leaves) that restrict draft.
Burn seasoned hardwood whenever possible. Wood dried to below 20% moisture content (verify with a moisture meter) burns hotter, produces less smoke, and minimizes creosote. Stack wood in a covered area with airflow for at least six months before burning. Avoid treated lumber, plywood, or trash, these release toxic fumes and accelerate chimney corrosion.
Annual professional inspections catch issues before they become hazards. A Level 1 inspection (visual check of accessible components) costs $100–$200 and satisfies most insurance requirements. Homes that travel frequently or experience a chimney fire need a Level 2 inspection, which includes video scans of the flue interior.
Homeowners embracing country-style home ideas often integrate wood stoves as both heating solutions and aesthetic anchors, making diligent maintenance part of the routine that keeps tiny homes safe and functional.
Conclusion
A properly chosen and installed wood stove transforms a tiny home from a novelty into a year-round dwelling. Prioritize clearances, invest in quality chimney components, and commit to a regular maintenance schedule. The result is affordable, reliable heat that works anywhere firewood does, and a home that stays cozy without grid dependency.