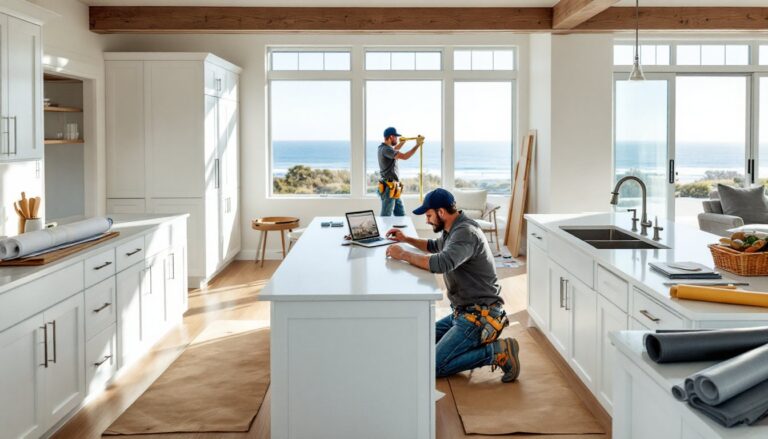
Setting up a home theater isn’t just about getting a bigger screen, the audio system transforms the entire experience. Sony’s earned its reputation in consumer audio through decades of innovation, from the Walkman to cutting-edge Dolby Atmos soundbars. Whether you’re retrofitting an existing living room or wiring a dedicated theater space, Sony offers speaker solutions across the budget spectrum. This guide walks through selecting, installing, and optimizing Sony home theater speakers, with practical advice for DIYers tackling their first surround sound setup or upgrading from outdated equipment.
Table of Contents
ToggleKey Takeaways
- Sony home theater speakers deliver clear dialogue through dedicated mid-range drivers and integrate seamlessly with non-Sony AV receivers, making them a flexible choice for mixed-brand setups.
- Proper speaker placement—including precise center channel height, 6-8 feet separation for front towers, and elevated surrounds on side walls—matters more than equipment cost for achieving quality surround sound.
- Installing Sony speakers requires careful wire routing, stud detection for safety, and testing before closing walls; using CL2/CL3-rated wire in enclosed spaces and 16-gauge wire for runs under 50 feet ensures reliability.
- Run your AV receiver’s auto-calibration after physical installation, but manually set tower speakers to ‘Small’ with an 80 Hz crossover to prevent overworking them and send bass to the subwoofer.
- The subwoofer ‘crawl’ technique—placing the sub at your seating position and moving it around the room to find where bass sounds smoothest—optimizes bass response for your specific acoustic space.
- Wireless Sony soundbar systems like the HT-A7000 eliminate in-wall wiring challenges and include upward-firing drivers for Dolby Atmos effects without requiring ceiling-mounted speakers.
Why Choose Sony for Your Home Theater Speaker System
Sony brings several advantages to home theater audio that matter for DIY installations. Their wireless connectivity standards, particularly on newer models, simplify cable runs through finished walls. You won’t need to fish speaker wire through every stud bay if you opt for a wireless rear speaker kit.
The company’s driver technology delivers clear dialogue reproduction, which matters more than most homeowners realize. Muffled center channel audio ranks among the top complaints in poorly configured systems. Sony’s center speakers typically feature dedicated mid-range drivers that handle vocal frequencies without coloring the sound.
Compatibility presents another practical benefit. Sony speakers integrate cleanly with non-Sony AV receivers, so you’re not locked into a single-brand ecosystem. Standard impedance ratings (typically 8 ohms) and sensitivity specs mean you can mix and match components as your system evolves.
Build quality varies by product line, but even mid-tier Sony speakers use MDF cabinets rather than plastic enclosures. That material choice reduces unwanted resonance, something you’d hear as cabinet vibration during bass-heavy scenes. Higher-end models incorporate internal bracing, which you can’t see but definitely hear in cleaner bass response.
Warranty support and parts availability matter for long-term ownership. Sony maintains service centers across the U.S., and replacement grilles, feet, and even individual drivers remain available years after purchase. That’s a consideration if you’re investing in floor-standing towers rather than budget satellites.
Top Sony Home Theater Speaker Options for Every Budget
Premium Sony Soundbar Systems
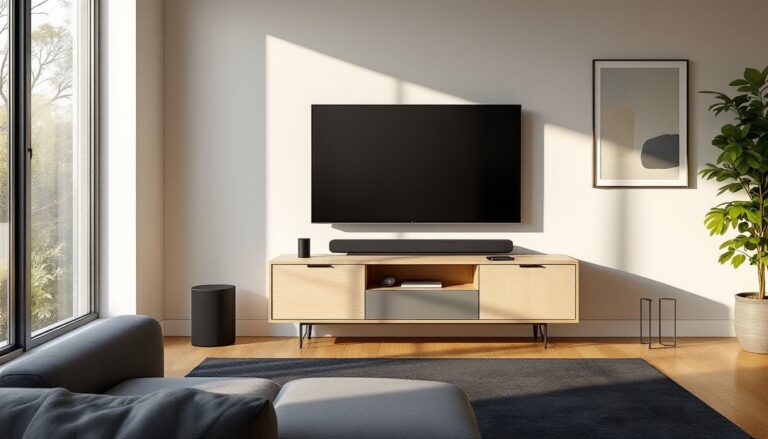
Soundbars solve the biggest DIY challenge in home theater: running wire through finished spaces. Sony’s flagship soundbars, the HT-A7000 and HT-A9, deliver Dolby Atmos and DTS:X without cutting into drywall.
The HT-A7000 measures 51.2 inches wide, so verify your media console can accommodate it before ordering. It includes upward-firing drivers for height channels, creating overhead sound effects without ceiling-mounted speakers. Pair it with Sony’s SA-RS3S wireless rear speakers (sold separately) for genuine surround sound. The rears connect to a small control box, you’ll need AC outlets near your seating area, but no wire runs back to the soundbar.
Installation requires wall-mounting or placing the bar directly in front of your TV. If wall-mounting, locate studs with a stud finder and use the included bracket. The bar weighs 19 pounds, so toggle bolts won’t cut it in drywall, hit solid framing. HDMI eARC connection to your TV handles audio and control signals through a single cable.
Sony’s newer soundbars feature room calibration that uses your phone’s microphone. Hold the phone at your primary seating position while the system plays test tones. It adjusts EQ to compensate for room acoustics, helpful in spaces with lots of hard surfaces that reflect sound.
Traditional Multi-Speaker Surround Sound Setups
For dedicated theater rooms or new construction, discrete speakers outperform soundbars. Sony’s Core Series (SS-CS5 towers, SS-CS8 center, SS-CS3 surrounds) provides a complete 5.1-channel system at mid-tier pricing. Independent testing of traditional speaker configurations shows discrete setups deliver better channel separation than all-in-one units.
The SS-CS5 towers stand 37.2 inches tall with a footprint of 9 x 10 inches. They’re front-ported, so you can place them closer to walls than rear-ported designs without bass bloat. Each tower handles 145 watts maximum, check your receiver’s output to avoid underpowering them.
Center channel placement matters more than most DIYers realize. The SS-CS8 should sit directly below or above your screen, aimed at ear height when seated. If it’s in a cabinet, pull it forward so the drivers clear the shelf edge. Recessed placement causes comb filtering, a hollow sound quality from reflected waves interfering with direct sound.
Surround speakers mount on side or rear walls, 2-3 feet above seated ear height. Use the included keyhole mounts or aftermarket brackets rated for the speaker weight (10 pounds each for SS-CS3). Drywall anchors work if you miss studs, but choose 50-pound-rated toggle bolts, not the plastic expansion type.
Subwoofer choice depends on room size. Sony’s SA-CS9 handles most living rooms under 300 square feet. Larger dedicated theaters benefit from dual subs, place them in opposite corners to minimize dead spots from standing waves. The Sub crawl technique helps: place the sub at your main seating position, play bass-heavy content, then crawl around the room’s perimeter to find where bass sounds smoothest. That’s where the sub should go.
Setting Up Your Sony Home Theater Speakers: A DIY Installation Guide
Tools needed:
- Stud finder
- Drill with bits for pilot holes
- Wire strippers
- Cable fish tape (for in-wall runs)
- Level
- Measuring tape
- Voltage tester (if running wire near electrical)
Materials:
- 16-gauge speaker wire for runs under 50 feet (14-gauge for longer runs)
- Wall plates and brush inserts for clean wire pass-throughs
- Cable staples (plastic, not metal, avoid crushing wire insulation)
- Banana plugs or spade connectors (optional but cleaner than bare wire)
Step-by-step installation:
-
Map your wire routes. Measure from receiver location to each speaker position. Add 15% for routing around obstacles and leaving service loops. In new construction, run wire before drywall goes up. In finished rooms, use baseboard channels or fish through walls.
-
Check for obstacles. Use a stud finder’s deep scan mode to locate pipes and electrical before drilling. Most building codes (verify local requirements) mandate 6-inch separation between low-voltage speaker wire and AC wiring when running parallel. Perpendicular crossings are fine.
-
Drill pass-through holes. For in-wall runs, drill through the top or bottom wall plates, usually found at ceiling height or floor level. A ¾-inch bit accommodates multiple wire bundles. Wear safety goggles and a dust mask: you’ll hit insulation and decades-old dust.
-
Pull wire carefully. Attach speaker wire to fish tape with electrical tape, wrapping smoothly to avoid snags. Pull steadily, yanking can separate conductors inside the jacket. If the wire binds, back off and find the snag point rather than forcing it.
-
Label everything. Tag both ends of each wire run (“Front Left +/−,” “Surround Right +/−”) before making connections. Reversed polarity won’t damage equipment but causes phase cancellation, thin, weird-sounding bass.
-
Strip and connect. Remove ½ inch of insulation from wire ends. Twist strands tightly so no loose filaments short across terminals. Most Sony speakers use spring clips or binding posts. Binding posts accept banana plugs or bare wire: tighten by hand until snug, not gorilla-tight.
-
Test before closing walls. Play test tones (your receiver’s setup menu includes these) to verify each speaker before installing wall plates or patching holes. Listen for buzzing (loose connection), silence (broken wire), or sound from the wrong speaker (crossed labels).
Safety notes: Always wear hearing protection when testing at high volume. If running wire in the same stud bay as electrical, use CL2-rated or CL3-rated in-wall speaker wire, it meets fire safety codes for enclosed spaces. Standard speaker wire is fine for surface runs.
Optimizing Your Room Layout for Sony Speaker Performance
Room dimensions influence speaker placement more than brand or price. Sony speakers follow the same acoustic principles as any other: reflections, absorption, and interference patterns determine what you actually hear.
Front speaker positioning: Place left and right towers 6-8 feet apart, angled (toed in) toward the primary seating position. This creates a focused soundstage, you’ll hear precise instrument placement in movie scores rather than generalized left/right audio. Distance from the front wall affects bass response. Start 12-18 inches out and adjust by ear. Too close amplifies bass: too far weakens it.
Center channel height: Mount or place the center so its tweeter (high-frequency driver) sits within 6 inches vertically of the screen’s center. Mounting above an 85-inch TV might require angled brackets to aim the speaker downward. Expert recommendations for speaker positioning and calibration emphasize precise center placement for dialogue clarity.
Surround speaker zones: In a 5.1 setup, surrounds go on side walls, 90-110 degrees from center seating. For 7.1, add rear speakers at 135-150 degrees. Measure angles from your primary seat, not the room’s center. Asymmetrical rooms require asymmetrical placement, trust angles over equidistant spacing.
Subwoofer location: Corner placement maximizes output (boundary reinforcement) but can cause boomy, one-note bass. The previously mentioned sub crawl finds optimal placement for your specific room. Carpet over concrete slabs needs less subwoofer gain than suspended wood floors, which transmit vibration to the space below. Use rubber isolation pads under the sub to minimize floor coupling.
Acoustic treatment basics: Hard surfaces (windows, drywall, hardwood) reflect high frequencies, creating echoes. Soft furnishings, couch, curtains, area rug, provide necessary absorption. Dedicated theater rooms benefit from acoustic panels on first-reflection points: the side wall spots where sound bounces from speakers to listener. Clap your hands and listen for slap echo. If you hear it, that wall needs treatment.
Calibration: Run your AV receiver’s auto-setup (Audyssey, YPAO, Dirac, etc.) after physical placement. These systems set speaker distances, levels, and crossover frequencies. Accept the distances and levels, but review the crossover settings. Many auto-calibration routines set tower speakers to “Large” (full-range), which overworks them. Setting all speakers to “Small” with an 80 Hz crossover sends bass to the subwoofer, where it belongs. Comparative analysis of Sony’s speaker lineup shows even flagship towers benefit from subwoofer support below 80 Hz.
Common mistakes: Placing surrounds behind the couch against the rear wall (they should be elevated and to the sides), mounting speakers inside cabinets with doors (severe frequency cancellation), and skipping the receiver’s level-matching routine (one loud speaker ruins the surround effect).
Conclusion
Sony home theater speakers deliver solid performance when properly installed and positioned. The physical work, running wire, mounting speakers, calibrating levels, matters more than brand names. Take time with placement, respect basic acoustic principles, and don’t skip the calibration step. Most “bad sound” complaints trace to installation shortcuts, not equipment deficiencies. A mid-tier Sony system in a well-treated room outperforms flagship speakers randomly scattered around hard surfaces.