Tiny homes have evolved from a niche curiosity to a mainstream housing solution, and if you’re considering downsizing or building an accessory dwelling unit (ADU), you’ve probably scrolled through hundreds of photos looking for the right layout. These images aren’t just eye candy, they’re practical blueprints for how to maximize limited square footage without sacrificing comfort or style. Whether you’re planning a ground-up build on a trailer chassis, converting a shipping container, or designing a backyard cottage, studying real-world examples is the smartest first step. The best tiny home pictures reveal what actually works: the framing approach, the window placement that makes 200 square feet feel airy, and the storage tricks that keep clutter at bay.
Table of Contents
ToggleKey Takeaways
- Tiny home pictures reveal practical design solutions—from window placement and vertical storage to framing techniques—that maximize limited square footage while maintaining comfort and style.
- Most tiny homes cost $30,000–$80,000 to build, significantly below median home prices, and allow DIYers to complete projects manageable for basic carpentry skills while still requiring compliance with building codes like the IRC.
- Exterior design in tiny homes balances aesthetics with functionality, using vertical materials like board-and-batten siding, metal roofing, and mixed-material contrasts that add visual depth while reducing weight and wind resistance for trailer-mounted builds.
- Interior designs that maximize every inch rely on multi-functional furniture, space-saving appliances, and vertical storage—kitchens cluster around 4–6 feet with compact appliances, while bathrooms shrink to 25–35 square feet with corner showers and wall-mounted sinks.
- Cost-effective tiny home builds leverage reclaimed materials, stock cabinets, single wet walls, and propane systems, but investing in quality insulation and air sealing prevents costly moisture and mold problems in tightly built spaces.
- Extract real value from tiny home pictures by measuring and sketching layouts to scale, identifying specific materials and construction sequences, verifying code compliance details, and using images to communicate clearly with contractors and designers.
Why Tiny Homes Continue to Captivate Homeowners
Tiny homes check boxes that traditional housing can’t match in 2026’s market. They’re affordable, most builds range from $30,000 to $80,000 depending on DIY labor versus contractor work, well below median home prices. They’re mobile (if built on a trailer), so zoning restrictions can sometimes be sidestepped, though you’ll still need to research local ADU ordinances and RV parking laws.
They also force intentional design. Every inch counts when you’re working with 100–400 square feet, so you’ll see built-in furniture, multi-function spaces, and vertical storage solutions that larger homes waste. This constraint breeds creativity.
From a building perspective, tiny homes let DIYers tackle projects they’d never attempt on a conventional house. Framing a 8×20-foot structure is manageable for a weekend warrior with basic carpentry skills. Electrical and plumbing runs are shorter, so material costs drop and troubleshooting is simpler. That said, building codes still apply, most jurisdictions require compliance with the International Residential Code (IRC) Appendix Q for tiny houses, or local ADU regulations. If your build exceeds 400 square feet or is permanently anchored, expect permit requirements.
Stunning Tiny Home Exteriors Worth Copying
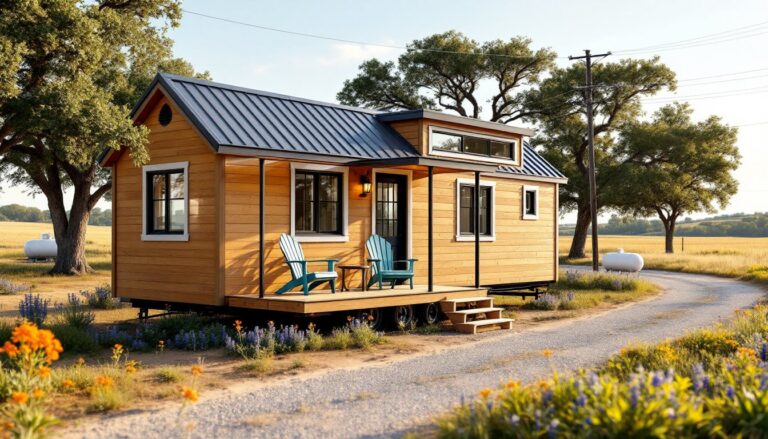
Exterior design in tiny homes balances aesthetics with weather resistance and weight (if trailer-mounted). The most striking builds use vertical board-and-batten siding or cedar shakes, which add texture without bulk. Metal roofing is nearly universal, standing seam panels weigh roughly 1.5 pounds per square foot compared to 2–4 pounds for asphalt shingles, and they shed rain and snow efficiently on the steep pitches (often 6/12 to 8/12) common in tiny home designs.
Window placement makes or breaks curb appeal and interior light. Large dual-pane casement or awning windows on the long walls bring in natural light while maintaining structural integrity: avoid cutting studs unnecessarily. Transom windows above doors add headroom visually without sacrificing wall-mounting space inside.
Many successful tiny home pictures showcase mixed materials, corrugated metal accent panels paired with wood siding, or black-framed windows against white-painted LP SmartSide. These contrasts create depth. If you’re building on a trailer, remember that siding choices affect wind resistance during towing: smoother profiles like shiplap or metal reduce drag compared to heavy stone veneer.
Exterior colors trend toward dark grays, forest greens, and matte black in 2026, which hide road grime if the home is mobile and blend into wooded or rural settings. Lighter tones work well in hot climates to reflect heat. Whatever you choose, use exterior-grade paint or stain rated for your climate zone, and apply two topcoats over a quality primer for longevity.
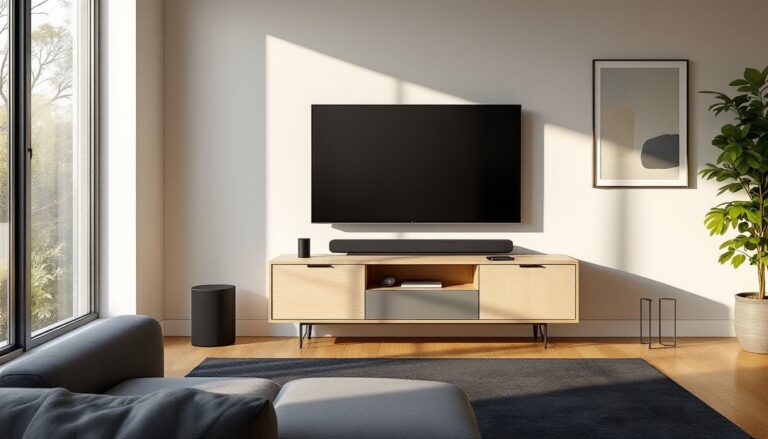
Clever Interior Designs That Maximize Every Inch
Tiny home interiors succeed when every design choice serves double duty. The most impressive photos you’ll find reveal furniture that folds, slides, or lifts to transform a space from a living room to a dining area to a bedroom within minutes.
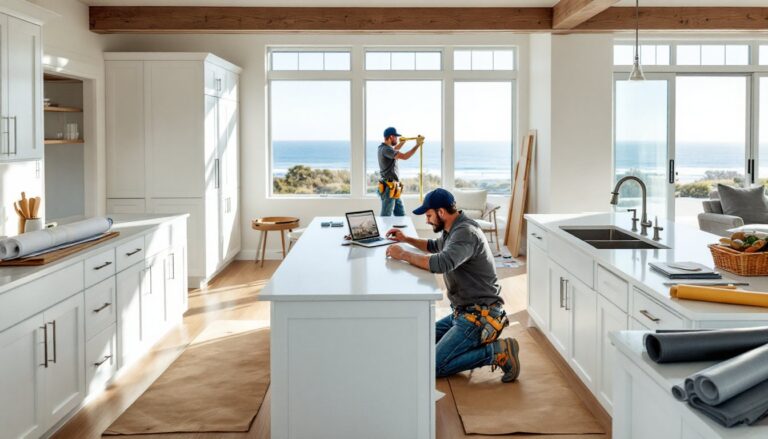
Space-Saving Kitchens and Bathrooms
Kitchens in tiny homes cluster around 24–36 inches of counter depth and 4–6 feet of length. The best layouts place the sink under a window for light and ventilation, with a two-burner cooktop (propane or induction) and a compact 3.5-cubic-foot refrigerator. Apartment-sized appliances (18–20 inches wide) fit the scale better than full-size units.
Storage is vertical: open shelving up to the ceiling, magnetic knife strips, pegboards for utensils, and pull-out pantry drawers in the toe-kick space beneath base cabinets. Skip the dishwasher unless you have a 300+ square foot build: a drying rack over the sink saves both space and plumbing complexity. Countertop material matters, butcher block is affordable and repairable, while quartz resists stains and doesn’t need sealing, though it’s heavier and pricier.
Bathrooms shrink to 25–35 square feet in most tiny homes. A corner shower stall (32×32 inches minimum per IRC) with a neo-angle door conserves floor space. Composting toilets (like Nature’s Head or Separett) eliminate black water tanks and allow off-grid placement, though they require regular maintenance and local codes may prohibit them if you’re hooking up to utilities. Standard flush toilets work fine if you’ve got sewer or septic access.
Wall-mounted sinks with exposed plumbing or pedestal models keep the floor clear. Skip the tub unless your design specifically prioritizes it, most tiny dwellers shower only. Ventilation is critical in such tight quarters: install a 120 CFM exhaust fan vented to the exterior to prevent mold. Many small space living ideas translate directly into tiny home bathrooms, especially around cabinet-free storage and hook systems.
Creative Sleeping Lofts and Bedroom Solutions
Sleeping lofts are iconic in tiny homes, but they’re not for everyone. Ceiling height in a loft typically ranges from 36 to 42 inches, enough to sit up but not stand. Access is via a ladder (most compact), alternating tread stairs (easier to climb, takes more space), or a full staircase with storage underneath (best for accessibility, requires 3–4 feet of floor length).
Framing a loft means adding 2×6 or 2×8 joists spanning the width of the home, typically 16 inches on center, and securing them to wall studs with joist hangers. If your home is trailer-mounted, the loft’s weight (framing, mattress, occupants) must stay within the trailer’s gross vehicle weight rating (GVWR). Plan for 50 pounds per square foot live load as a baseline.
Ground-floor bedrooms work better for families, older adults, or anyone who dislikes ladders. Murphy beds (wall beds) fold up to reveal living space during the day: they require a clear wall at least 8 feet wide and sturdy blocking behind the drywall. Another option: a platform bed with drawers underneath, which doubles as a couch with throw pillows.
Lighting in sleeping areas should be LED strips or sconces to avoid heat buildup in a confined space. Add a ceiling fan if your loft gets stuffy, mechanical ventilation codes (IRC M1507) often require it in sleeping rooms anyway.
Budget-Friendly Tiny Home Ideas from Real Builds
The most cost-effective tiny home pictures often show DIY builds using reclaimed materials and simplified systems. Here’s where real builders save money without compromising safety:
- Used trailer frames: A flatbed utility trailer (16–24 feet) runs $3,000–$6,000 new, but you can find used examples for half that. Inspect for rust, check axle ratings, and verify the hitch and brakes work. Rewelding and sandblasting add cost but extend life.
- Reclaimed wood siding and flooring: Salvaged barn wood or pallet wood can clad exteriors or become accent walls, but always check for rot, termites, and lead paint. Kiln-dried reclaimed lumber is safer and more stable.
- Warehouse-store cabinets: Stock kitchen cabinets from big-box retailers cost 40–60% less than custom builds. A 24-inch base cabinet runs $80–$150: upper cabinets are even cheaper. Paint or stain them to match your aesthetic.
- Propane over electric: Running a tiny home on propane (cooktop, hot water, heat) cuts electrical load and installation costs. A 20-pound tank lasts weeks for cooking: a 100-pound tank can heat a well-insulated tiny home through a mild winter. This matters if you’re off-grid or using a generator.
- Simplified plumbing: A single wet wall (kitchen and bathroom back-to-back) halves the PEX or copper runs you’ll need. Use a tankless propane water heater mounted outside to save interior space and cost.
DIYers who frame, insulate, and finish interiors themselves often spend $20,000–$35,000 in materials for a basic 200-square-foot build. Hiring out electrical (to meet NEC code and pass inspection) and plumbing (for code compliance and leak prevention) is common, budget $2,000–$4,000 for each trade. Many of the renovation inspiration galleries showcase tiny home makeovers that started with bare shells.
Avoid cutting corners on insulation and air sealing. Spray foam (closed-cell, R-6 per inch) is pricier than fiberglass batts but eliminates drafts and moisture infiltration, critical in a small, tightly built space. Skimping here leads to condensation, mold, and expensive fixes.
How to Use Tiny Home Pictures for Your Own Project
Photos are research, not blueprints. Here’s how to extract real value from the images you save:
Measure and sketch. When you see a layout you like, estimate dimensions based on visible clues, standard door width is 30–32 inches, countertops are typically 25 inches deep, mattresses are 60×80 inches (queen). Sketch the floor plan to scale on graph paper (¼ inch = 1 foot works well). This reveals whether that beautiful kitchen layout will actually fit your trailer width.
Identify materials. Zoom in on pictures to spot siding profiles, window brands, flooring types, and hardware finishes. If a build blog or modern architecture feature lists materials, save that info. Matching materials saves guesswork at the lumberyard.
Note the construction sequence. Progress photos show framing before insulation, sheathing before siding, rough plumbing before drywall. This order matters. Trying to retrofit electrical after walls are closed up is miserable.
Check for code details. Look for egress windows in sleeping lofts (IRC requires 5.7 square feet of openable area and a 24-inch-high by 20-inch-wide clear opening), handrails on stairs (required if more than three risers), and GFCI outlets near sinks (NEC mandate). If a photo doesn’t show these, don’t assume they’re absent, just verify them in your own plan.
Join online communities. Tiny home forums and social media groups let you ask builders directly about the pictures they post: “What size beam did you use for that loft span?” or “How did you waterproof that window trim?” Firsthand answers beat guessing.
Hire a designer for tricky parts. If you love a layout but aren’t sure how to frame a complex roof pitch or cantilever a deck, a few hours with a residential designer or architect ($100–$200/hour) can produce stamped drawings. In many jurisdictions, you’ll need these for permits anyway.
Use pictures to communicate with contractors, too. Showing your electrician a photo of the breaker panel location you want is clearer than describing it. Same with tile installers, carpenters, and painters, a reference image prevents costly misunderstandings.